
Pelvic floor exercises



Article content
Keeping your pelvic floor muscles in good shape is crucial for all women, whatever their age. Especially for those who leak urine, gas and/or stool, who are pregnant or going through menopause, for whom pelvic floor exercises greatly improve their quality of life.
How to find your pelvic floor
It’s a common question from patients starting treatment. The pelvic floor muscles are still largely unknown, and it’s hard to contract them correctly if you haven’t first become aware of where they are.
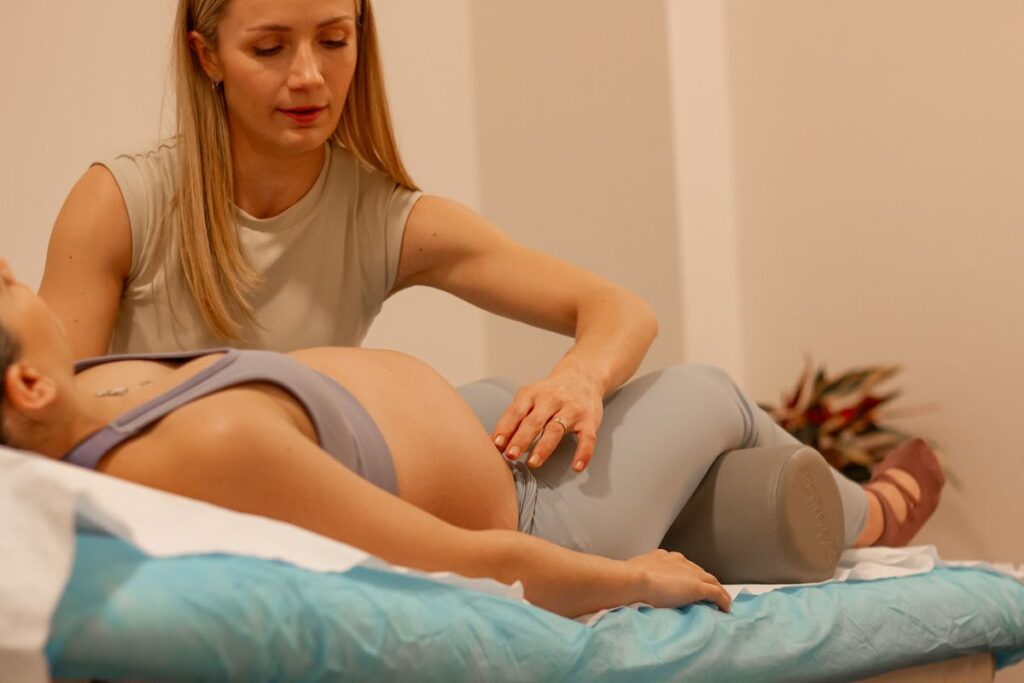
First of all, an internal vaginal assessment is essential, done by a physiotherapist specializing in the pelvic floor. By palpating, stretching and pressing on the vaginal walls, we send the patient a signal of where she needs to contract.
Then we ask the woman to contract her pelvic floor and notice the resistance the therapist applies with her fingers. This helps you “find,” feel and teach your body what that contraction really feels like.
You can also do it yourself at home, by feeling with your fingers and squeezing the muscles at the same time. What you should notice is the vagina closing (pressure on your fingers). The contraction is often compared to the feeling of stopping the flow of urine, or lifting an imaginary elevator inside your genitals.
If during this process you don’t feel a clear squeeze and lift of the muscles, you should ask a professional for help. It could mean your muscles have lost strength, perhaps after giving birth or after genital surgery.
Specific pelvic floor exercises: hypopressive abdominals
Hypopressive abdominal exercises are among the most highly rated exercises for postpartum recovery. You can start from the eighth week after giving birth, but if there has been surgery (cesarean, episiotomy, etc.) your professional will tell you when you can start low-pressure exercise.
How are hypopressive exercises done? It’s essential that you adopt the right posture. You’ll probably feel some discomfort in parts of your body, tension in your arms… These are positions you’ve probably never adopted before and they’ll feel strange at first.
To do the routine, there are 5 key points you need to follow to do hypopressives correctly.
- Self-lengthening: stretch your spine as much as you can, as if you wanted to grow taller.
- Double chin: tuck your chin in, pulling the crown of your head upward. This will increase the feeling of lengthening.
- Breathe in deeply: take a deep breath, filling your lungs completely and opening your rib cage.
- Breathe out deeply: breathe out, emptying your lungs completely.
- Breath-hold: after breathing out, open your rib cage without taking in air (you can help yourself by pinching your nose).
Basic position: lying on your back
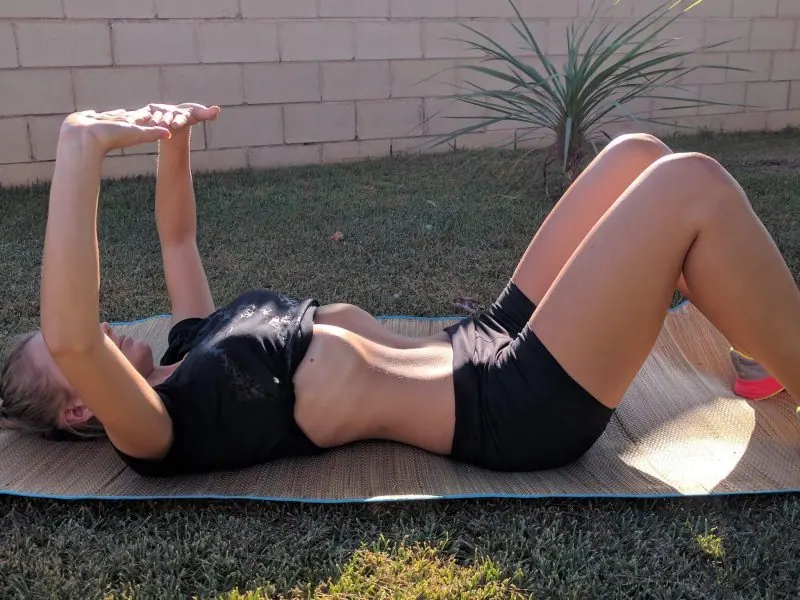
This is an easy exercise in which you’ll feel your spine lengthen. Follow these steps to practice it:
- Lie on your back with your knees slightly bent and your heels on the floor.
- Do the self-lengthening and double chin, explained above in case you don’t remember.
- Place your pelvis in a neutral position. To do this, there should be a small gap under your lower back, so it isn’t resting completely on the floor.
- Raise your arms toward the ceiling, bend your elbows and flex your wrists (palms facing the ceiling); you should feel your shoulders rotate inward.
Once you’re in this position, breathe in through your nose for 2 seconds and out through your mouth for 4 seconds (repeat 3 times, relaxed).
- On the last exhalation, without breathing in, open your ribs (as if you were about to take a sudden breath) and hold your breath for 8 seconds.
Then take 3 normal breaths and hold your breath again, this time for longer (10 seconds).
On all fours
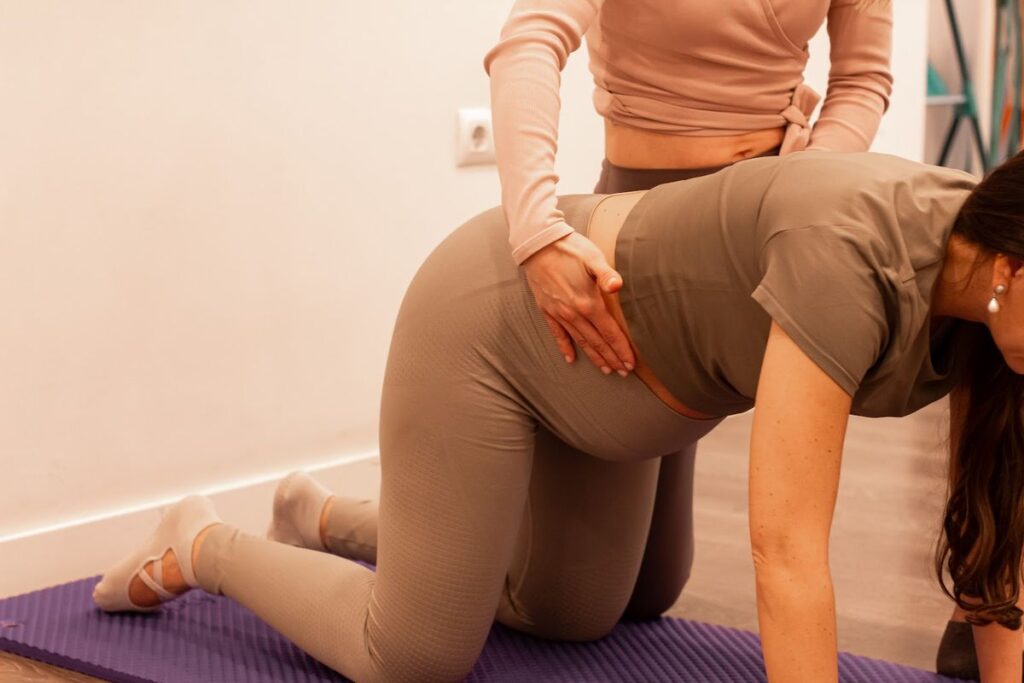
- Get down on all fours; if your knees bother you, you can put some cushions underneath.
- Your thighs should be vertical to the floor (knees under your hips), with your toes resting on the floor.
- Bend your elbows and rest your forearms on the floor, hands together.
- Next, rest your forehead on your hands (lowering your head and trunk). Try to keep your spine as long as possible and tuck your chin in. Point your elbows out to the sides, as shown in the picture.
Once you’re in position, breathe in deeply, opening your rib cage, and breathe out slowly.
- Repeat 3 times and, after the last exhalation, without breathing in, open your ribs firmly.
- Hold your breath for 10 seconds and repeat the routine.
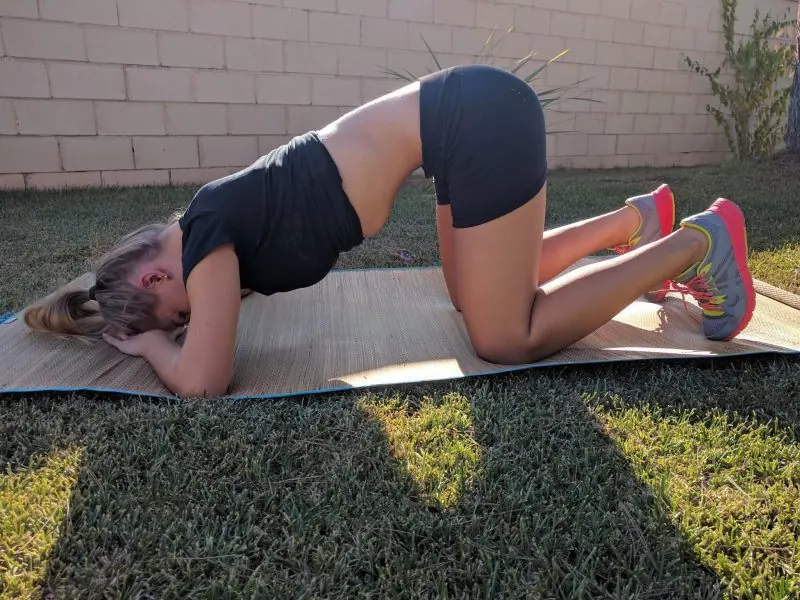
This type of breathing creates an abdominal vacuum, which reduces pressure in the abdomen. The internal organs are drawn upward, the diaphragm stretches and a reflex contraction of the pelvic floor is triggered.
The benefits of hypopressive abdominal exercises are:
- Restoring good posture
- Reducing back pain
- Reducing diastasis of the rectus abdominis
- Toning and strengthening the abs without harming the pelvic muscles
- Restoring pelvic floor tone
- Repositioning the organs (treatment for prolapse)
- Improving circulation
- Improving bowel transit
Specific pelvic floor exercises: exercises with a soft ball
The small Pilates ball is a very common tool in physiotherapy. When we sit on this ball, for example placing it on a chair, we notice that our postural muscles engage automatically. As a result, we adopt a correct posture and activate the deep trunk muscles, such as the transverse abdominis and the pelvic floor. Some of the most basic exercises with a soft ball are:
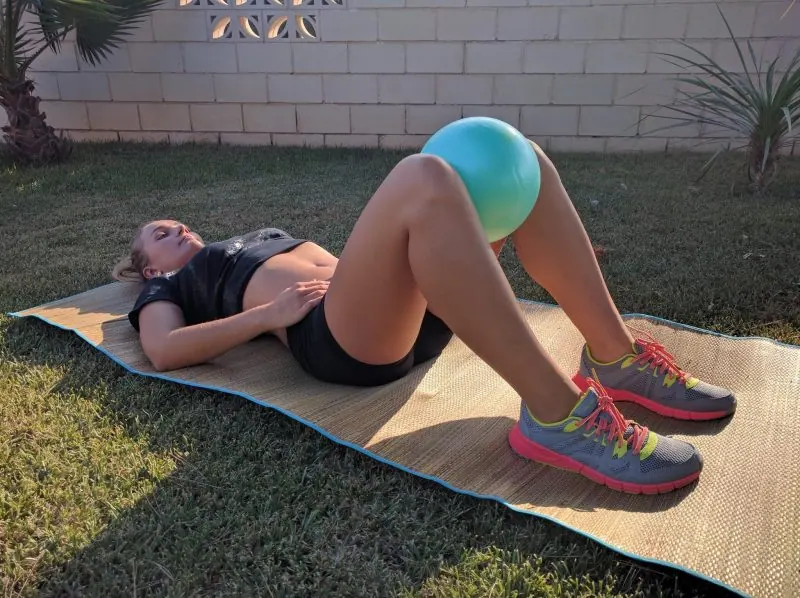
Basic contraction
- Lie on your back with your legs bent and your arms stretched out alongside your body. Place the ball between your knees, with the soles of your feet on the floor.
- Your pelvis should be in a neutral position. To do this, there should be a small gap under your lower back, so it isn’t resting completely on the floor.
- In this position, take a deep breath, open your rib cage and, as you breathe out, activate your transverse abdominis (closing your ribs, drawing your belly button in) and squeeze the ball. You’ll feel the muscles contract in your inner thighs, perineum and abdomen.
- Repeat 20 times.
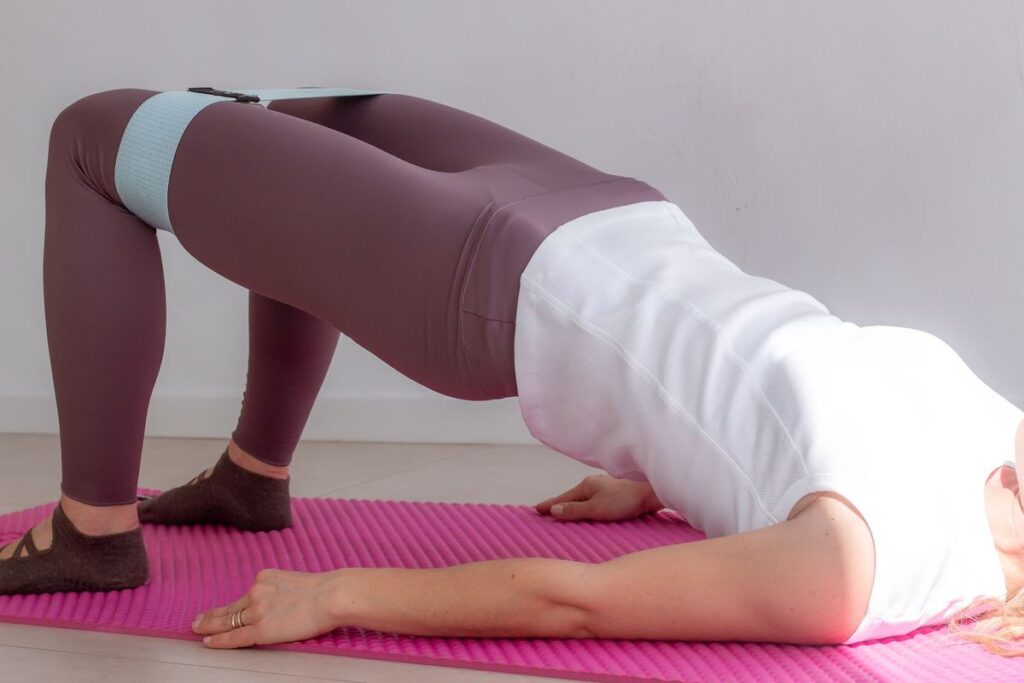
Shoulder bridge
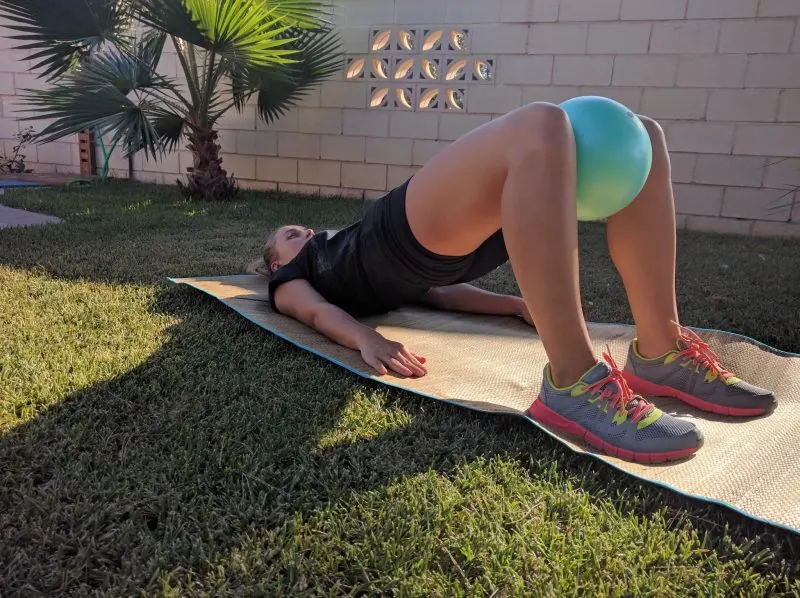
- Lie on your back with your legs bent and place the ball between your knees.
- Take a deep breath and, as you breathe out, bring your pubic bone toward your nose (posterior pelvic tilt, pressing your lower back into the floor) and start lifting your pelvis, then your lower and upper back.
- Breathe in with your trunk raised and, as you breathe out, roll down one vertebra at a time. Lifting the trunk will activate all the deep muscles (including the pelvic floor).
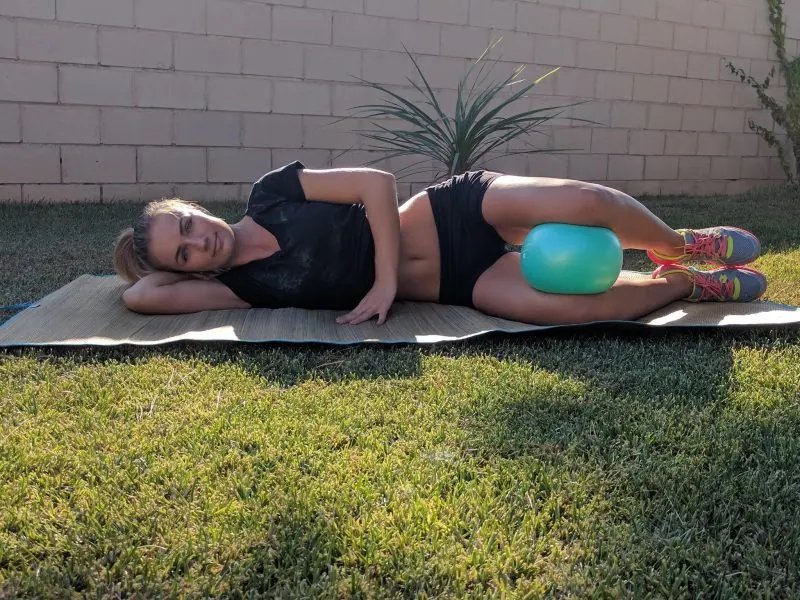
Frog
- Lie on your side, put one arm under your head and rest your top hand on the floor in front of your chest.
- Bend your legs and place the ball between your knees (ankles together).
- Take a deep breath and, as you breathe out, squeeze the ball with your knees and draw your belly button toward your lower spine, activating the transverse abdominis and the pelvic floor. You’ll feel a strong contraction of the whole abdominal and pelvic unit.
This exercise is highly recommended for pregnant women, who can’t tolerate many exercises in a row lying on their back.
Advanced exercise
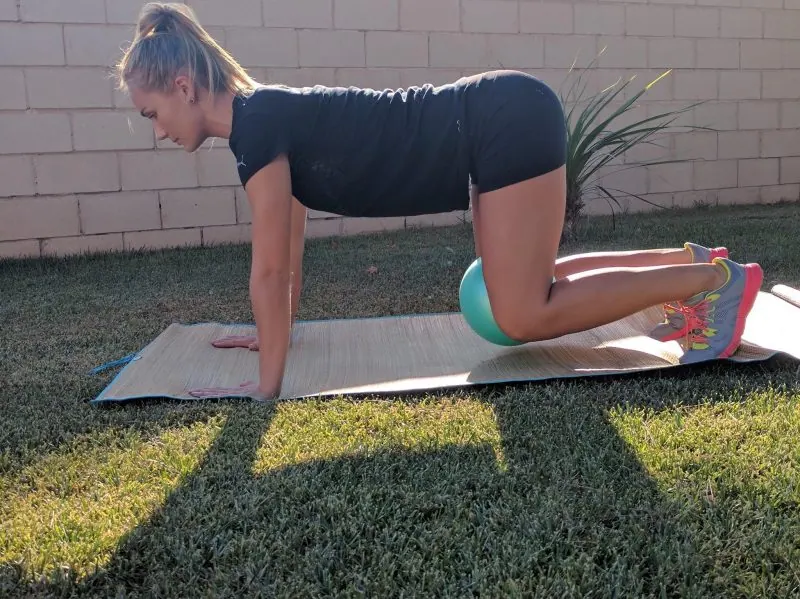
- Starting position: on all fours, place your wrists under your shoulders and your knees under your hips, flex your feet (toes on the floor) and place the ball between your knees.
- Breathe in deeply and, as you breathe out, squeeze the ball with your knees and lift your trunk (raising your knees about 2 cm/1 inch off the floor), keeping your belly button drawn in and your rib cage closed. Breathe in as you slowly lower down.
- Repeat 10 times.
Specific pelvic floor exercises: Kegel exercises
Women who have never done pelvic floor exercises and have only recently started working this area should choose a group of easier exercises and gradually increase the intensity. For them, it’s best to start the routine with Kegel exercises, as they can be done anytime, anywhere.
They consist of contracting and relaxing the muscles over many repetitions to build strength in those muscles. Bear in mind that preventing incontinence, prolapse or other conditions requires more complete work that increases tone as well as strength. So Kegel exercises should be combined with hypopressives or some Pilates exercises.
To learn how to do them, see this Kegel exercise routine for women. When practicing, using Kegel balls will give your results a boost.
Specific pelvic floor exercises: Pilates for the pelvic floor
The Pilates method is great for rehabilitating musculoskeletal injuries and keeping your body in good shape. But if you want it to strengthen or rehabilitate your pelvic floor, we advise you to read this article.
Many Pilates exercises, such as the hundred, increase intra-abdominal pressure and push it down toward the pelvis. This pressure could weaken and stretch the pelvic floor. If the exercise is repeated many times, or if most of the positions involve both legs raised, the pelvic floor is put under great pressure, and this can be dangerous.
Here is a Pilates exercise that protects and strengthens the deep muscles of the pelvis and abdominal cavity.
Reflex contraction
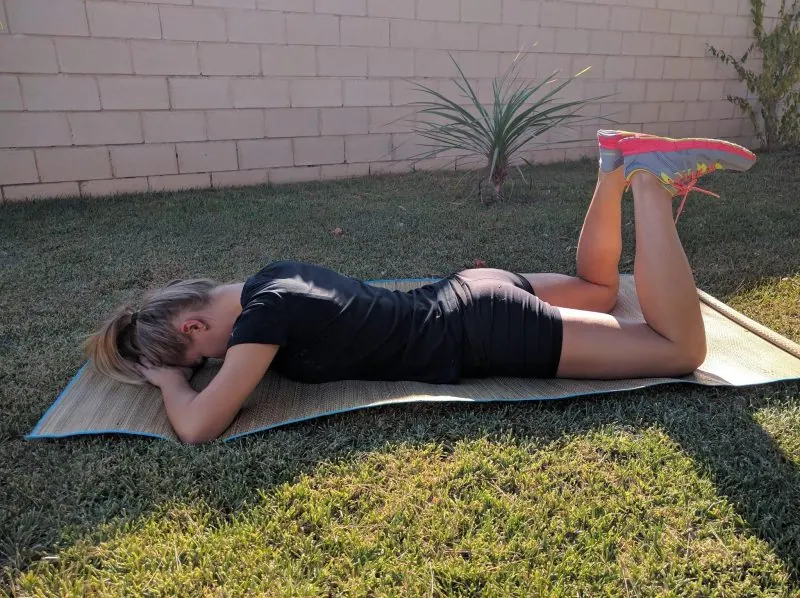
- Lie face down, place your hands under your forehead and relax your shoulders.
- Bend your knees and move them apart.
- Bring your heels together and point your toes outward (your feet forming a V).
- As you breathe in, send the air to the back of your lungs and, as you breathe out, lift your belly button off the floor (draw it in) and press your heels together (heel against heel). You’ll feel a reflex contraction of your pelvic floor. This exercise is very effective!
If you’d like to practice pelvic floor exercises in Valencia with the help of a specialist physiotherapist, book your appointment here.


Get your pelvic floor checked in Valencia
Something doesn’t have to go wrong: with a pelvic floor check-up we see how it is and what you should do. Can’t come to Valencia? We also see patients in an online consultation.